Piano Tuning
For years Dad used to tuned pianos as a side job...he's since retired from tuning. But he still has all his tools and recently he came to tune our piano and I finally took the opportunity to watch, take notes and pictures so I can at least keep our own piano in tune.
I've decided to put together a few simple pages of notes...mostly to get them organized and to use it as a reference...so here goes:
Before starting on the piano, take a wrench and screwdriver and tighten the bench legs and lid.
Then prop the top open and remove the front panel (on an upright). Our Yamaha upright has two latches then the whole front (front panel, music ledge, key cover) comes off as one unit. Take that off and set it carefully to the side.
We also removed the lower panel (below the keys and above the pedals) to access the bottom inside of the piano.
We expose all of this then use a little vacuum and pull out any dust that may be inside the piano...this is done before any tuning begins.
Further inspection before tuning includes checking the pedals. The RH pedal should have a small bit of play in it before it actuates and move the dampers approx. 1/4" away from the strings. The LH pedal should actuate immediately upon being pressed.
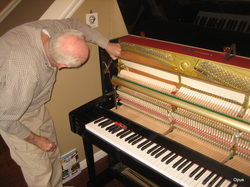
The mute is also removed before tuning begins. The Yamaha mute comes off easily by removing one Philips head screw on the left side and sliding the pin out of the right side. Keep track of any screws, washers, felt washers, etc. And pay attention how things come apart so you can put them back together easily.
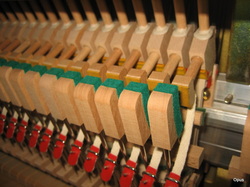
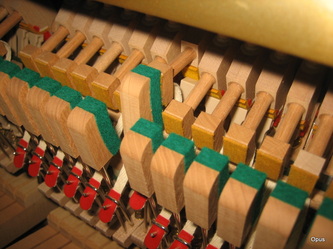
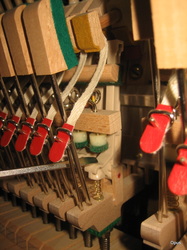
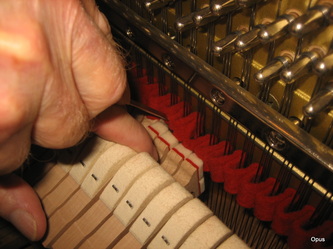
Then we inspect the action. The back check (green felt on it) should move slightly when the key is pressed. This same slack we should see in the jack (beige plastic piece). The jack shouldn't hit the hammer immediately when the key is pressed.
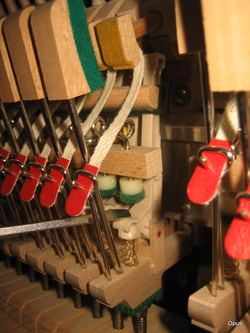
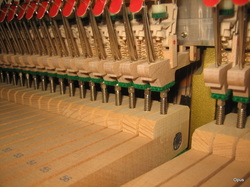
If there isn't sufficient slack, this can be added (or subtracted) by adjusting the capstan screw(silver screw at the back of each key).
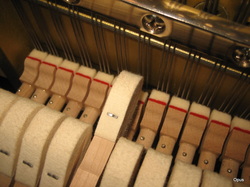
We also checked the spacing between the hammer and the strings after the strings have been struck. The hammer should be about 3/4" away from the strings...if it isn't, this is usually fixed by bending the back check in the direction needed.
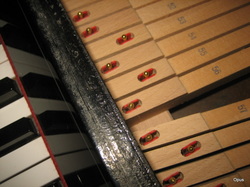
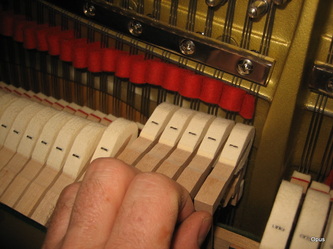
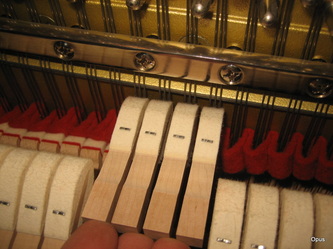
Stuck keys are also pretty common especially on older pianos...and Dad says 90% of the time, the sticking occurs on the guide pins on the keys themselves.
This picture shoes the pins seen w/ the front panel off. There is another pin that is under the key and requires removing the piece that holds the keys down. Over time, the wood can swell and push the felt into the pin causing the key to stick. There is a tool which compresses the felt to get the free play back where it needs to be. Of course, there can be multiple other reasons for keys sticking...this is just one of the most common. With any stuck key, you'll want to inspect the entire mechanism.
OK...on to the tuning!
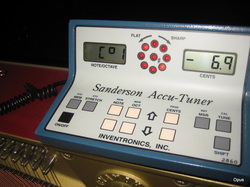
First we check how flat the piano is...if the piano is more than ~10 cents flat, you may need to do two tunings to bring it back up to pitch. So we'll take the tuner and check a few notes to see where the piano is. Our piano was about 8 cents flat on the lower register and 5-6 cents flat in octaves 3 and 4...so one tuning should be fine to bring it back to where it should be.
First we check how flat the piano is...if the piano is more than ~10 cents flat, you may need to do two tunings to bring it back up to pitch. So we'll take the tuner and check a few notes to see where the piano is. Our piano was about 8 cents flat on the lower register and 5-6 cents flat in octaves 3 and 4...so one tuning should be fine to bring it back to where it should be.
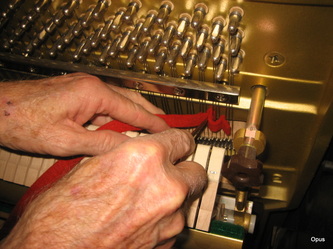
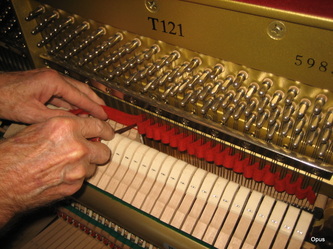
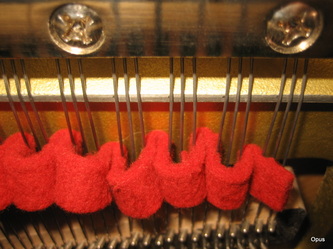
We start by inserting felt in between each set of triple strings to dampen the LH and RH strings isolating the center string. Some felt ends up above the hammer and other below...just make sure it doesn't interfere w/ the movement of the hammer.
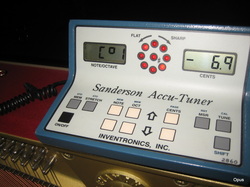
We're using Dad's tuner (it's a bit old, but still works perfectly). Here are the steps to fire this tuner up:
1. Power on
2. Hit "Tune"
3. Push "Shift" and "Page" until 22 shows up in the cents screen. 22 is the tuning map for a 48" Yamaha upright...which is what we have.
4. Click "Note" up one click
5. Click "Note" down one click
6. Tuner is ready to go
1. Power on
2. Hit "Tune"
3. Push "Shift" and "Page" until 22 shows up in the cents screen. 22 is the tuning map for a 48" Yamaha upright...which is what we have.
4. Click "Note" up one click
5. Click "Note" down one click
6. Tuner is ready to go
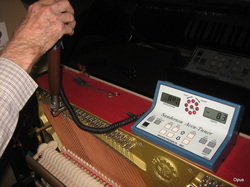
Always start with the bass strings and work toward the highs. Dad's tuner has a button that attaches to the tuning lever so you can adjust which note you are tuning by clicking the button w/o having to push a button on the tuner.
We start w/ A0...and just go note by note. The first several strings are single strings...then they transition to doubles. Higher quality pianos start the doubles sooner...more strings = better / fuller tone.
Tuning the single bass strings is straight forward...just tune it to what the machine tells you to do. You want to have the lights steady...if they roll to the right, you're sharp...if they roll to the left, you're flat. Strike each key firmly when tuning.
One key to getting the string movement to stabilize is with the tuning pin. Dad recommends bringing the string up so it reads sharp on the tuner...then bring it back to dead on. To "set" the pin, pull the tuning lever toward you. This also drops the pitch of the string...so if you bump the string a bit sharp, the "set" the pin a few times, it can bring the string back to exactly where you want it. We'll use this technique on all strings...not just the single bass strings. If the pitch moves around a lot another technique is to strike the key hard...sometimes this can "settle" the string down to hold the pitch you're trying to set.
Once you get to the double strings, use the rubber mute to isolate each string. When you set the mute between two pairs of strings, you will begin to tune with a pattern that is pretty efficient. You'll have already tuned the right hand string from having the damper in between the previous pair...so your tuning lever is on the upper pin (right hand string) and you'll finish tuning that string. Then move the hammer to the bottom pin of string two and click the button to the next note of on the tuner. Tune that string, then move the tuning lever to the upper pin of that pair and move the mute in between the next set of doubles and tune the string you're on w/o clicking the button to advance the note on the tuner. So did you follow all of that? Kind of confusing trying to describe it...but it makes sense to me! :)
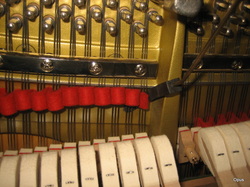
Ok...on to the triple strings. We'll use the tuner and go note by note only tuning the middle string. When you reach an edge, use a rubber mute to help isolate the middle string.
Once you make it to the end, remove the felt and start where the triple strings begin...again working your way from low to high. Now we will be tuning the left and right side strings but by ear...no machine. You could use the machine to do all 3 strings of each note, but we're doing the remaining two by ear...unison tuning. So we're using the middle string as the reference tone and bringing the other two strings up to it. We use the rubber mute to dampen the right hand string of note 1 and the left hand string of note 2. As a rule of thumb, move the tuning lever first, tune, then move the mute...this process makes moving along the soundboard more efficient.
And as a reminder, tune each string a bit high, then bring it back to dead on by "setting" the pin...you can hear it when the string comes "in". When the string your working on isn't in unison w/ the middle string, you can hear individual beats...the further out of tune it is, the more beats you hear. When the string is in tune, the pitch is solid and steady.
Once we finish unison tuning all the triple strings, we'll take the rubber mute and start w/ the double strings and do one more quick check by ear making minor adjustments where needed. Sometimes it's helpful to pluck the individual string rather than hitting the key to hear if the strings are in unison. This is helpful in the upper register where the strings are short and sound vibrations are much faster...but will work for any string.
So as a quick review:
1. Tune with the machine, all single and double strings and the middle string of the triples (using the strip felt).
2. By ear tune the left and right side strings of the triples.
3. By ear check the double strings.
4. By ear re-check the triples using the rubber mute and plucking individual strings as needed.
Now it's time to put everything back together. Dad would place his business card under the lid and write on it when each tuning occured...or write on the key itself when each tuning took place.
We'll have a follow up piano tuning teaching session to look at some of the specialty tools used in servicing pianos and a grand piano tuning.
